

Week 2: Needle Felting: Giving Form to Fiber
June 26 - June 30
Instructor: Stephanie Metz
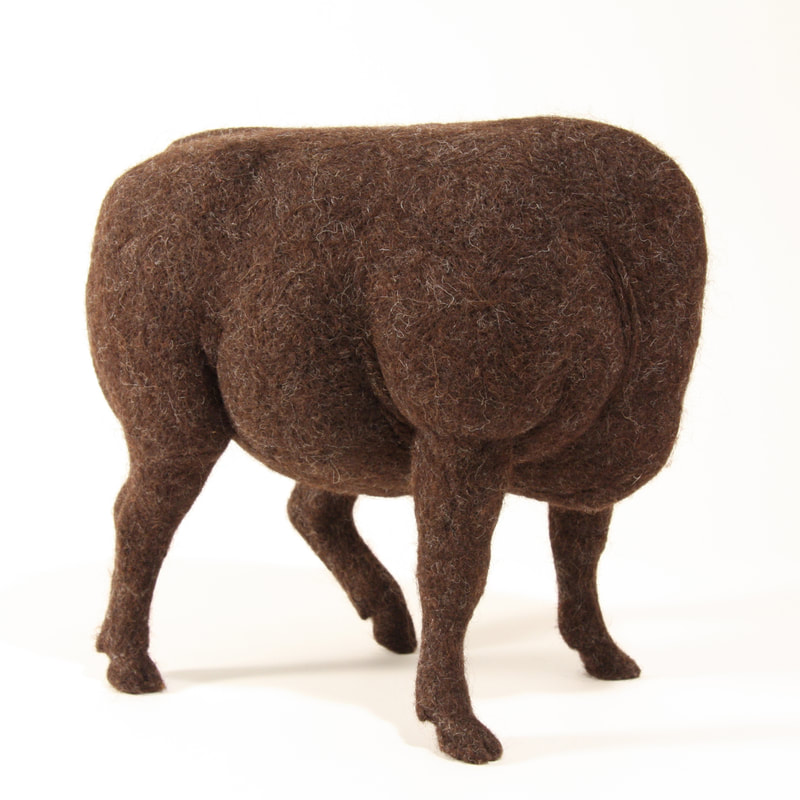
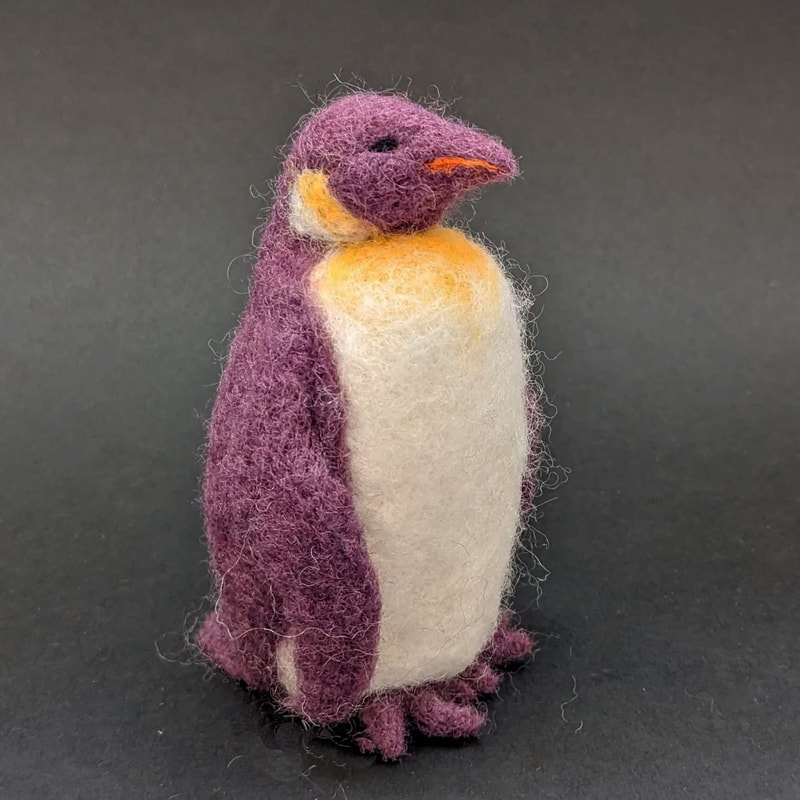
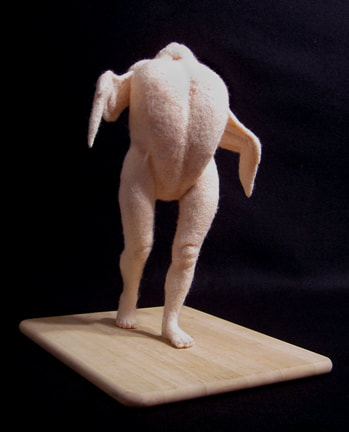
You probably think of cloth when you hear the word 'fiber', so you might not know there is a way to work with fiber to make sculpture that doesn't involve sewing. Needle felting is the method for shaping loose, fluffy wool into firm but squishy objects by poking at it with special sharp needles. In this workshop you'll learn how to wield a felting needle tool to make three-dimensional creatures out of fiber, but you'll also learn how to use the Design Thinking Process to create art.
How is making a sculpture a 'problem' to solve? Well, it involves thinking about what you want to make and what tools and materials you'll use, deciding on the characteristics you want it to have, identifying the steps that it may take to achieve that outcome, trying things out, and adapting your approach as needed. Needle felting is a wonderful technique to use for sculpture: unlike working with clay, wool, or stone, felt is endlessly changeable and forgiving.
Please note: campers will be using sharp needle tools, although great care will be taken to use them safely.
Needle felting takes patience and focus and a lot of time, especially in the early stages of sculpting - but that patience will pay off in satisfaction when a camper puts in the effort!
June 26 - June 30
Instructor: Stephanie Metz
You probably think of cloth when you hear the word 'fiber', so you might not know there is a way to work with fiber to make sculpture that doesn't involve sewing. Needle felting is the method for shaping loose, fluffy wool into firm but squishy objects by poking at it with special sharp needles. In this workshop you'll learn how to wield a felting needle tool to make three-dimensional creatures out of fiber, but you'll also learn how to use the Design Thinking Process to create art.
How is making a sculpture a 'problem' to solve? Well, it involves thinking about what you want to make and what tools and materials you'll use, deciding on the characteristics you want it to have, identifying the steps that it may take to achieve that outcome, trying things out, and adapting your approach as needed. Needle felting is a wonderful technique to use for sculpture: unlike working with clay, wool, or stone, felt is endlessly changeable and forgiving.
Please note: campers will be using sharp needle tools, although great care will be taken to use them safely.
Needle felting takes patience and focus and a lot of time, especially in the early stages of sculpting - but that patience will pay off in satisfaction when a camper puts in the effort!
Monday (June 26th)
9:00 am Housekeeping and intros: learn about the instructor and the plan for the week
9:15 am Ice breaker activity: Make a NameTag- Multi-Part Creature
● Each student cuts up and decorates sticky labels to make a creature-shaped name tag with legs, flippers, tails, wings, or any other limb necessary, then introduces themselves (and their name tag) to the group.
Materials: sticky nametag, labels, pens, scissors
9:45 am Activity/Lesson: What is needle felting, and why does it even work?
● hands-on demonstration of needle felting and introduction of key concepts, tool use, and safety
10:15 am BREAK
10:30 am Activity/Lesson: Getting hands-on
● Learn how felting works and feels
● Learn and practice safe use of felting needles
● Get comfortable controlling the needle by working 2-dimensionally
● Using cookie cutters as stencils to get started stabbing at wool
Materials: cookie cutters, craft felt, wool roving, felting needles, foam rubber work surface
11:30 am LUNCH
12:15 pm Activity/Lesson: Practice and Plan
● Keep working on stencil practice piece
● Think about the creature, real or imaginary, you’d like to create this week
● What characteristics do you want your 3D creature to have (color, size, limbs, ability to stand up?)
● What are the characteristics of wool and felt? What do you think you CAN do and CANNOT do with felted wool?
Materials: pencil, journal, pens
12:45 pm Transition into Tinker Time: brief reflection in Maker Journal
● Note what you learned so far, and what you hope to learn and make.
1:00 pm TINKER TIME
● Practice needle felting
● Use image sources provided for creature ideas
● Sketch a few ideas for your creature
Materials: wool, felting needles, foam rubber work surface, paper, pencils, pens
2:15 pm Snack
2:30 pm Review of day and Camper assessment of activities
2:45 pm Clean Up
3:00 pm Camper Pick Up
Photos
Tuesday (June 27th)
9:00 am Warm Up Activity: Creature plans
● Draw or describe 2 possible creatures you’d like to make, then share the description or image with the group
Materials: paper, pens, pencils
9:30 am Activity/Lesson: Creating Basic Shapes: Working in 3D
● Make an egg form, a log form, and a wormy shape to practice manipulating fibers into the shapes you want
Materials: felting needles, wool roving, foam rubber work surface
10:15 am BREAK
10:30 am Activity/Lesson: Continue with Basic Shapes
11:30 am LUNCH
12:15 pm Activity/Lesson: Troubleshooting
● Are your shapes looking and acting like you intended?
● How to make changes to shape, size, and density
Materials: scissors, felting needles, wool roving, foam rubber work surface
1:00 pm TINKER TIME
● Work on projects; teacher one-on-ones
2:15 pm Snack
2:30 pm Review of day and Camper assessment of activities
2:45 pm Clean Up
3:00 pm Camper Pick Up
Photos
Wednesday (June 28th)
9:00 am Warm Up Activity: Learning to Look
● Worksheet: identifying positive and negative space
Materials: worksheet, pencils
9:30 am Activity/Lesson: Breaking it down
● Discuss how you would divide up the component parts of your creature
● Make a parts list or illustration, with sizes
● Map out color plan; smaller, thinner parts will be made using color, bigger parts will be made of white then covered with color
Materials: paper, pencils, pens
10:15 am BREAK
10:30 am Activity/Lesson: Start on Parts
● Begin making items of your parts list
● Check in on size and symmetry
Materials: felting needles, wool roving, foam rubber work surface
11:30 am LUNCH
12:15 pm Continue Morning Activity
● How does it need to LOOK and ACT? Firm or squishy? Smooth or fluffy? Does it need extra support from a wire armature?
Materials: felting needles, wool roving, foam rubber work surface
1:00 pm TINKER TIME
● Work on projects; teacher one-on-ones
2:15 pm Snack
2:30 pm Review of day and Camper assessment of activities
2:45 pm Clean Up
3:00 pm Camper Pick Up
Photos
Thursday (June 29th)
9:00 am Warm Up Activity: Anatomy of joints
● Discussion of different types of joints in limbs, and how that affects how they look and act when translated to felt
Materials: worksheet, pencil
9:30 am Activity/Lesson: Putting It Together
● Demonstration of joining component parts into a whole
● Demonstration of adding in a simple wire armature support piece
● Review of students’ creature parts in progress
Materials: felting needles, wool roving, foam rubber work surface, wire, wire cutters, x-acto blade
10:15 am BREAK
10:30 am Activity/Lesson: Joining
● Once part list is complete, begin attaching limbs and body together
● One-on-one help with armature wire as needed
Materials: felting needles, wool roving, foam rubber work surface
11:30 am LUNCH
12:15 pm Activity/Lesson: Color!
● Demonstration of adding color: solid, blended, patterned
Materials: dyed and naturally colored wool roving
1:00 pm TINKER TIME
● Work on projects; teacher one-on-ones
2:15 pm Snack
2:30 pm Review of day and Camper assessment of activities
2:45 pm Clean Up
3:00 pm Camper Pick Up
Photos
Friday (June 30th)
9:00 am Warm Up Activity: Challenges in Creature-Making
● Share problems, frustrations, solutions, and suggestions with the group
9:30 am Activity/Lesson: Troubleshooting Later in the Game
● Comparing plans to results
● Making changes: small or dramatic?
10:15 am BREAK
10:30 am Activity/Lesson: Details
● Adding surface or color details
● Adjusting joints or armatures
Materials: felting needles, wool roving, foam rubber work
11:30 am LUNCH
12:15 pm Continue Morning Activity
12:45 pm TINKER TIME – ONLY if weekly project is complete
● Finish Creatures
● Name Creatures
● Make a label for the Student Showcase
2:30 pm Daily Camper Assessment
Weekly Camper Survey
2:45 pm Snack
3:00 pm Clean Up and Prep for Showcase
3:30 pm Student Showcase
4:30 pm Camper Pick Up
Photos
|
|
