Week 5: Inflatable Worlds: Pattern Design with Air
July 17 - July 21
Instructor: Amy Brown
Learn how to create basic 3D shapes from plastic and tape - and blow it up! Create plastic bag monsters, or design a house. We will use glue, tape, and sewing machines to put together pieces of our creation and use the best free stuffing on the planet - air! As we design, we will learn about geometry, how air flow changes their shapes and movement, and lots of uses for the ever-present plastic bag.
Monday (July 17th)
9:00 am Housekeeping and intros: Hi, I’m Amy! This is the kind of stuff I make.
9:10 am Ice Breaker activity: Personal Dance Moves
● Standing in a circle, each camper introduces themselves with an alliterative adjective (i.e. Hilarious Hugo) and a short
dance move that goes with it. The group will repeat the name and mirror the dance move. At the end, the whole group
will dance all the moves one by one.
9:30 am Activity/Lesson: Let’s blow this up
● Use our breath to inflate a plastic bag (pumps and straws)
● How to close it up
● What’s not working? How do we fix it?
10:15 am BREAK
10:30 am Activity/Lesson: Changing the Shape
● Lay plastic bag flat and draw lines
● Cut along lines, cut keep two sides of bag together
● Use clear tape to connect the two sides
● Connect the collar
11:00 am Discussion: Where are the inflatables?
● Types of inflatables and how they are constructed
● Why would something be filled with air instead of stuffing?
● Is anything in this room a potential inflatable?
11:15 am Activity/Lesson: Making a ball
● How big do you want to make it? Diameter, Circumference and Pie
● Making a paper pattern
● Cut it out, tape it together
● Can we connect more than one?
11:30 am LUNCH
12:15 pm Activity: Donut Blow-up
Now that we’ve completed a round inflatable, let’s try one with a hole in the center. Remember to leave a tab on the
outside of the circle to make an inflation port. Decorate with sharpies. Fill and seal!
1:00 pm TINKER TIME
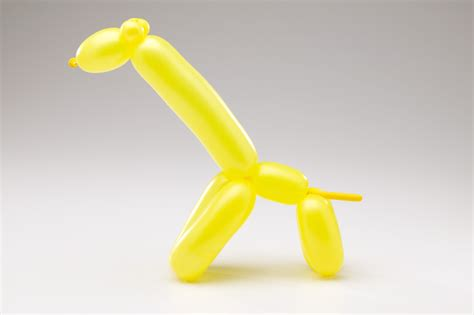
Optional Activity: Balloon animals
2:15 pm Snack
2:30 pm Daily Camper Assessment
2:45 pm Clean Up
3:00 pm Camper Pick Up
Photos
Tuesday (July 18th): Thread and Tape
9:00 am Activity: Making a cube
● A cube is a 3D square, so all sides are equal
● How many sides?
● Let’s cut it out of paper and tape it together
9:15 am Activity: BIG CUBE
● Split into teams, cut 4 foot squares from plastic sheeting
● Tape together with duct tape, make sure to not leave any sticky sides
● Cut hole for fan
● Inflate!
10:05 am Presentation: Inflatable Architecture
10:15 am BREAK
10:30 am Activity: Lamination - quilting with plastic
● Layer plastics - experiment with cut-outs between layers
● Quilt patterns to try
● Use iron and wax paper to melt the layers together
● Can we make a really large piece this way?
11:00 am Activity: Hand sewing basics
● How to thread a needle and tie a knot
● Running stitch, whip stitch, blanket stitch
● Cut circle and use stitches to gather into a flat ball
● This can be attached as an appendage to a larger inflatable, like an eye
11:30 am LUNCH
12:15 pm Activity: Sewing machine intro
● Not that scary-- and gets things done fast
● Sew on paper
● Sew on laminated plastics
12:45 pm TINKER TIME
Optional Activity: sewing machine practice
2:15 pm Snack
2:30 pm Daily Camper Assessment
2:45 pm Clean Up
3:00 pm Camper Pick Up
Photos
Wednesday (July 19th): Tape vs Heat
9:00 am Activity: Heat welding - making seams with an iron
● Use wax paper to protect plastic
● Start with low setting and apply the iron for only a few seconds
● Simple seam vs flat seam vs French seam
9:15 am Activity: TUBE TIME - airflow superhighways
● Cut bottom and handles from plastic bags, cut one side, fold longways
● Use tape or heat to make a seam down the long side
● Attach first finished tube to second finished tube
● Attach them all! Can we go all the way across the classroom? Do we need multiple fans?
9:45 am Activity: BIG FORT
Design large-scale structure as a group
How tall? How long?
What are the dimensions and how many pieces are needed?
Make small versions out of paper and tape, or plastic stuffed with more plastic
10:15 am BREAK
10:30 am Activity: Inflatable Alphabet
● Make a paper pattern of the first letter of your name from a sheet of paper (11” tall)
● We will attempt to make this a CLOSED inflatable- use tape or iron
● How to apply heat to a center hole? What about sharp recess/dent?
11:00 am Activity: Balloon Skeleton
There are 206 bones in the human body: 80 axial (big, main bones) and 126 appendicular (appendages). We’re going to
make them out of balloons.
Materials: long balloons, pumps, sharpies, tape
11:30 am LUNCH
12:15 pm Continue baloon skeleton
12:45 pm TINKER TIME
Optional Activity: Ballon origami
2:15 pm Snack
2:30 pm Daily Camper Assessment
2:45 pm Clean Up
3:00 pm Camper Pick Up
Photos
Thursday (July 20th): How big can it get?
9:00 am Activity: The Big Fort
● Agree on dimensions
● What’s the bottom made of?
● How do we get in?
● Assign crews to cutting
● Lay out all pieces
9:30 am Activity: Taping the fort (duct tape)
● How to avoid sticking (with plastic strips)
● Reinforce corners
10:00 am Activity: Air power: creating connections and filling the fort
● Make tube to connect fan to fort
● Make collar to attach the two
● Where does it get blown up?
10:15 am BREAK
10:30 am Activity: Plastic bag monsters
● Use only three plastic bags to create something that has a personality
● Hair, eyes - draw or create more shapes
11:00 am Activity: Storytelling: who is this monster?
● They have a busy day-- what’s on their to-do list?
● What did they like to do when they were little?
● What do they like best about themselves?
11:30 am LUNCH
12:15 pm Troubleshooting fort building, continue to tape
12:45 pm TINKER TIME
optional: work on fort
2:15 pm Snack
2:30 pm Daily Camper Assessment
2:45 pm Clean Up
3:00 pm Camper Pick Up
Photos
Friday (July 21st): Trouble-shooting
9:00 am Reflection on the week
What did you think the hardest part of making an inflatable would be? What ended up being easy vs challenging?
9:15 am Activity: Air Maze
Using paper and pencil, let’s design a paper-sized line maze. Transfer that with Sharpie to a clear plastic, with plenty of
space around the edges to insert an inflation port. Using a paper line template, use the iron to heat-seal the lines on your
maze. Don’t seal up the inflation port! Let’s see if the air we inflate it with can make it through all the sections.
10:15 am BREAK
10:30 am Activity: Test fort inflation
Look for holes or weak spots. Test entrance-- is it strong enough? Is too much air getting through?
11:30 am LUNCH
12:15 pm Continue Fort Construction
12:45 pm TINKER TIME – ONLY if weekly project is complete
2:30 pm Daily Camper Assessment
Weekly Camper Survey
2:45 pm Snack
3:00 pm Clean Up and Prep for Showcase
3:30 pm Student Showcase
4:30 pm Camper Pick Up
Photos


