


Week 6: Sculpting with Air
July 22 - July 26
Instructor: Amy Brown
Learn how to create basic 3D shapes from plastic and tape - and blow it up! Create plastic bag monsters, or design a house. We will use glue, tape, and sewing machines to put together pieces of our creation and use the best free stuffing on the planet - air! As we design, we will learn about geometry, how air flow changes their shapes and movement, and lots of uses for the ever-present plastic bag.
Monday (July 22nd)
9:00 am Housekeeping and intros: Hi, I’m Amy! This is the kind of stuff I make.
9:10 am Ice Breaker activity: Two truths and a Lie
9:30 am Activity/Lesson: What is an inflatable? What’s the simplest inflatable? Use a plastic bag and a box fan to make a very
simple animal.
● Make a list
● Sketch it out in notebook
● What pieces do we need?
Materials: Plastic bags, tape, cardstock, paperclips, sharpies, scissors
10:15 am BREAK
10:30 am Activity/Lesson: Continue working on plastic bag animals
11:00 am Lesson: Heat Welding Demo with Iron and wax paper and cardboard to make donut
Materials: iron, plastic roll, scissors, thread, wax paper, sharpies
11:45 am LUNCH
12:30 pm TINKER TIME - Intro to Tinker Journal
Optional Activity: Miniature “Wavy arm tube guy”
Materials: small fan and cylinders, fringe, sharpies
2:15 pm Snack
2:30 pm Review of day and Clean up
2:45 pm Daily Camper Assessment
3:00 pm Camper Pick Up
Photos
|
Tuesday (July 23rd): Thread and Tape
9:00 am Activity: Making a cube
● A cube is a 3D square, so all sides are equal
● How many sides?
● Let’s cut it out of paper and tape it together
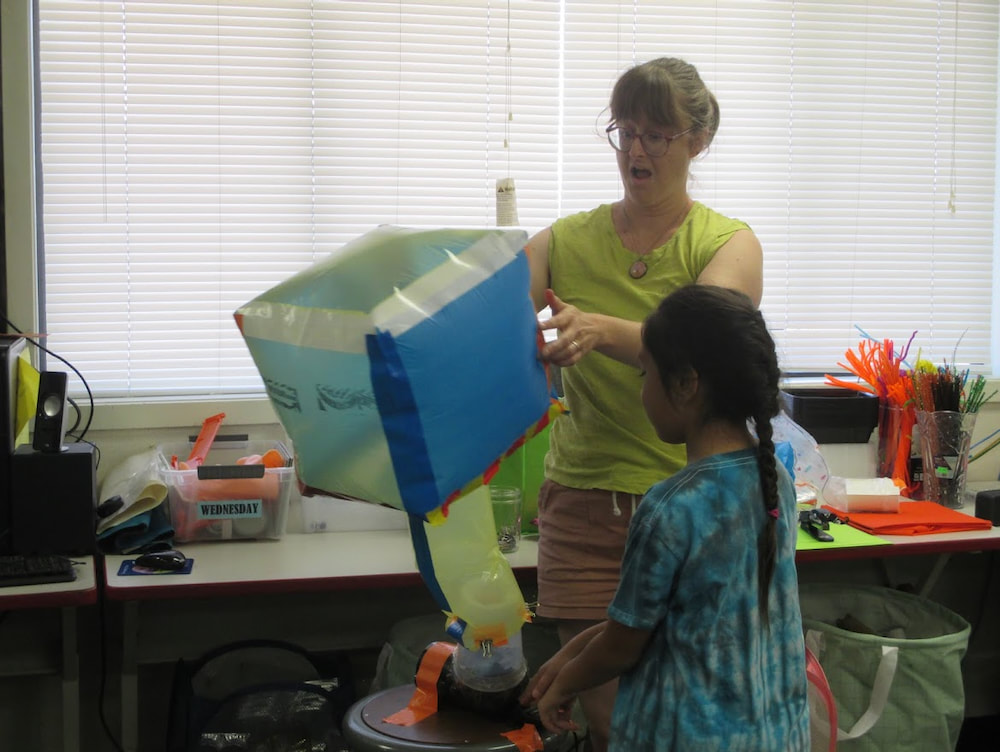
9:15 am Activity: BIG CUBE
● Split into teams, cut 4 foot squares from plastic sheeting
● Tape together with duct tape, make sure to not leave any sticky sides
● Cut hole for fan
● Inflate!
10:05 am Presentation: Inflatable Architecture
10:15 am BREAK
10:30 am Activity: Lamination - quilting with plastic
● Layer plastics - experiment with cut-outs between layers
● Quilt patterns to try
● Use iron and wax paper to melt the layers together
● Can we make a really large piece this way?
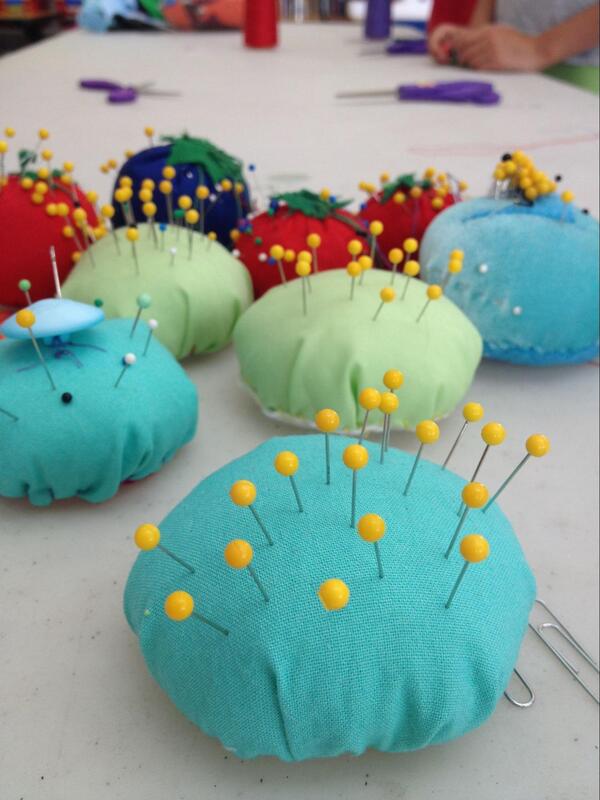
11:00 am Activity: Hand sewing basics
● How to thread a needle and tie a knot
● Running stitch, whip stitch, blanket stitch
● Cut circle and use stitches to gather into a flat ball
● This can be attached as an appendage to a larger inflatable, like an eye
11:45 am LUNCH
12:30 pm Activity: Sewing machine intro
● Not that scary-- and gets things done fast
● Sew on paper
● Sew on laminated plastics
12:45 pm TINKER TIME
Optional Activity: sewing machine practice
2:15 pm Snack
2:30 pm Review of day and Clean up
2:45 pm Daily Camper Assessment
3:00 pm Camper Pick Up
Photos
9:00 am Activity: Making a cube
● A cube is a 3D square, so all sides are equal
● How many sides?
● Let’s cut it out of paper and tape it together
9:15 am Activity: BIG CUBE
● Split into teams, cut 4 foot squares from plastic sheeting
● Tape together with duct tape, make sure to not leave any sticky sides
● Cut hole for fan
● Inflate!
10:05 am Presentation: Inflatable Architecture
10:15 am BREAK
10:30 am Activity: Lamination - quilting with plastic
● Layer plastics - experiment with cut-outs between layers
● Quilt patterns to try
● Use iron and wax paper to melt the layers together
● Can we make a really large piece this way?
11:00 am Activity: Hand sewing basics
● How to thread a needle and tie a knot
● Running stitch, whip stitch, blanket stitch
● Cut circle and use stitches to gather into a flat ball
● This can be attached as an appendage to a larger inflatable, like an eye
11:45 am LUNCH
12:30 pm Activity: Sewing machine intro
● Not that scary-- and gets things done fast
● Sew on paper
● Sew on laminated plastics
12:45 pm TINKER TIME
Optional Activity: sewing machine practice
2:15 pm Snack
2:30 pm Review of day and Clean up
2:45 pm Daily Camper Assessment
3:00 pm Camper Pick Up
Photos

|
Wednesday (July 24th): Tape vs Heat
9:00 am Activity: Collage and Lamination
Description: Using a stack of 8” squares of plastic, design a collage of plastic pieces and thread that fills the middle space--
leave at least a 1⁄2” of boarder. Iron. Now you have made a more durable and excited plastic fabric!
● Small pieces like this can be sewn together in a patchwork to create a quilt or tote bag
● Cut a larger shape out of plastic and have the entire class fill it up (section of a ball)
● If we have 4-6 pieces like this and put it all together, what would it make? A ball!!
9:30 am Activity: Beach Ball
Description: Campers will each make 4 pieces (bottom, insides, top piece) and iron. One piece will need a hole to attach
an inflation tube. All pieces can be decorated with sharpies.
● Sketch ideas, cut pieces
● Ball can be made of collaged pieces, solid, or a mix.
10:15 am BREAK
10:30 am Activity: BIG FORT
Description: We begin to talk about how to build the Big Fort, a squashed dodecahedron: 5 pentagons, a larger pentagon
for the floor, and 5 triangles. We will do the math on how big this needs to be! Then we will brainstorm ways to make it
and things to add.
● What are we naming this thing? Does it have windows?
● Decide on measurements
● Start cutting pieces from tablecloths
11:45 am LUNCH
12:30 pm Continue with Fort Design or Beach Balls
12:45 pm TINKER TIME
Optional Activity: Plush Balloon Letters - sketch a paper pattern and use fabric to create a balloon-like pillow
2:15 pm Snack
2:30 pm Review of day and Clean up
2:45 pm Daily Camper Assessment
3:00 pm Camper Pick Up
Photos

|
Thursday (July 25th): How big can it get?
9:00 am Activity: Monster Stories. We will draw free-form monsters, detail them, and use a simple formula to give them
personalities.
Materials: Paper, sharpies, notecards, notebooks
9:30 am Activity: Plastic Bag Monsters
Description: Pick a monster from our last exercise and let’s try to make it from a plastic bag.
● add elements
● Change the shape
● Inflate!
Materials: plastic bags, sharpies, scissors, paperclips, cardstock
10:00 am Activity: Continue cutting pieces for fort and taping together.
10:15 am BREAK
10:30 am Activity: Fort Building or making windows for fort
11:45 am LUNCH
12:30 pm Troubleshooting fort building, continue to tape
12:45 pm TINKER TIME
optional: Work on Fort or monster
2:15 pm Snack
2:30 pm Review of day and Clean up
2:45 pm Daily Camper Assessment
3:00 pm Camper Pick Up
Photos
|
Friday (July 26th): Trouble-shooting
9:00 am Activity: Inflato-flowers
We need some landscaping for our building! Sketch a flower with a stem.
● Cut out and build using sewing machine or heat weld
9:45 am Activity: Fort Building - let’s get finished!
10:15 am BREAK
10:30 am Activity: Fort Building, flowers
11:45 am LUNCH
12:30 pm Continue Fort Construction
12:45 pm TINKER TIME – ONLY if weekly project is complete (fort, flowers, monster, beachball)
2:30 pm Daily Camper Assessment
Weekly Camper Survey
2:45 pm Snack
3:00 pm Clean Up and Prep for Showcase
3:30 pm Student Showcase
4:30 pm Camper Pick Up
Photos
Showcase Photos
|
|
